The SEO and Sitemap panel lets you control how search engines and AI assistants find and understand each of your domains. No technical knowledge is needed. Everything is handled with simple switches, and the two files search engines rely on are created and published for you automatically.
Search engines such as Google and Bing, and AI assistants such as ChatGPT, Perplexity, Google AI and Copilot, discover your website using two small files that live on your domain. The first is sitemap.xml, a list of the pages you want found and indexed. The second is robots.txt, the rules for which crawlers are allowed to read your site. This panel controls both, per domain, without touching any code. When you save, both files are generated and published to your live domain instantly, and they are kept up to date every time you publish or unpublish pages.
It also keeps your private pages private. Thank you pages, checkout pages, upsells and members area pages are automatically kept out of search results.
Opening the SEO and Sitemap panel
Go to Settings, then Domains. Find the domain you want to manage and click the SEO / Sitemap gear icon on that domain's row. The settings panel opens, titled with the name of the domain you picked.

Each domain has its own independent settings. A domain that has never been set up starts with everything switched off, and nothing is created on your live site until you turn a switch on and click Save.
The panel at a glance
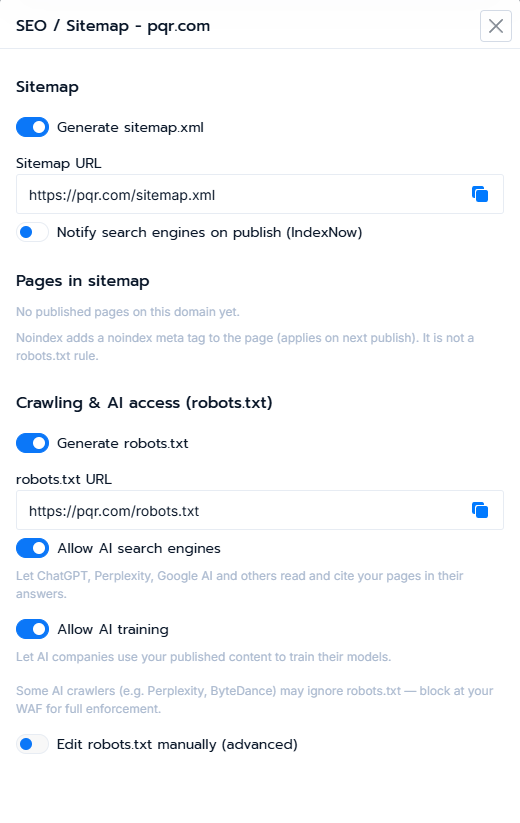
The panel has three areas: Sitemap, Pages in sitemap, and Crawling and AI access (robots.txt). Below is the whole panel for a domain that has sitemap and robots turned on.
Sitemap
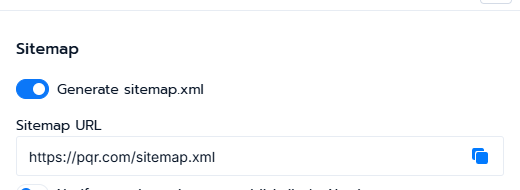
Generate sitemap.xml turns your sitemap on or off. When it is on, a sitemap.xml file is created and published to your domain, listing the pages you have chosen to include. This is what you give to Google so it knows which pages to crawl. When it is off, no sitemap is generated, and if one already exists it is removed from your live site. Turn it on if you want your site found in search. Leave it off for a site you do not want indexed at all, for example a private funnel only domain.
Sitemap URL shows the public address of your sitemap once it is on, for example https://yourdomain.com/sitemap.xml. Use the copy button next to it to copy the address, which you will paste into Google Search Console later.
Notify search engines on publish (IndexNow) is an optional switch. When enabled, every time you publish or change pages, search engines are instantly notified that your content has changed, so they can re crawl sooner instead of waiting days. This speeds up indexing on Bing and Yandex, and Bing also powers ChatGPT Search and Microsoft Copilot. It does not affect Google, which discovers changes through its normal crawl and your sitemap. There is no setup needed, a key is generated for you. It is safe to leave on.
Pages in sitemap
This section appears when the sitemap is turned on. It lists every published page on the domain in a table with two switches per page. The Page column shows the page name and its live address. The Sitemap switch controls whether the page is included in sitemap.xml. The Noindex switch controls whether the page is hidden from search results.
Include in sitemap controls whether the page is listed in your sitemap, which is the same as actively suggesting it to Google for indexing. On includes the page, off leaves it out.
Private (noindex) adds a no index instruction to the page, telling search engines not to show it in their results at all. Use this for pages you do not want people finding in Google, such as thank you pages, download or delivery pages, and upsell pages. A no indexed page is also automatically left out of the sitemap.
One thing to remember: the no index instruction is added to the page itself, so it only takes effect the next time that page is published. If you switch a page to private, re publish it so the change reaches the live page. Removing a page from the sitemap happens immediately.
You do not have to protect every page by hand. Funnel pages and membership pages are automatically set to private and excluded from the sitemap as soon as they are published. These are pages such as checkout pages, upsell and one time offer pages, thank you and order confirmation pages, and members area and login pages. A small private label next to a page name shows it is being treated as private. You can always override this. If you actually want one of these pages indexed, for example the public landing page of a funnel, switch Include in sitemap on and Private off for that page, then save and re publish it. Normal website pages are included by default.
Crawling and AI access (robots.txt)
This section controls your robots.txt file, the rules that tell crawlers what they may access.
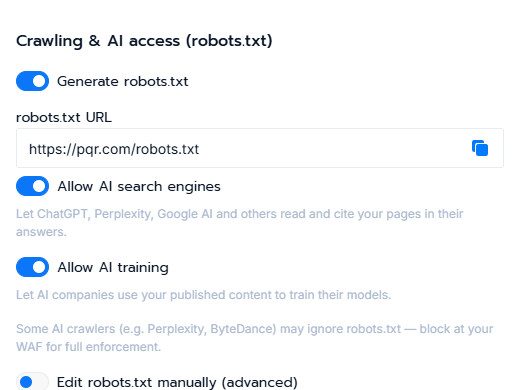
Generate robots.txt turns your robots file on or off. When it is on, a robots.txt file is created and published, including a reference to your sitemap and your chosen AI crawler rules. When it is off, no robots file is generated, and any existing one is removed from your live site.
robots.txt URL shows the public address of the file once it is on, for example https://yourdomain.com/robots.txt, with a copy button.
Allow AI search engines controls whether AI answer engines such as ChatGPT, Perplexity, Google AI and Copilot are allowed to read and cite your pages in their answers. On, which is recommended, lets your content appear and be cited in AI search results, which can drive traffic and visibility. Off asks these AI tools not to use your pages, which removes you from AI answers.
Allow AI training controls whether AI companies may use your published content to train their models. On allows it. Off asks AI training crawlers to stay away. Turning this off has no effect on normal search rankings or on AI search citations, it only opts you out of model training.
Please note that some crawlers, for example Perplexity and ByteDance, are known to ignore robots.txt rules. For guaranteed blocking you would need a firewall or WAF rule at the server level. The robots file alone is a request, not an enforcement.
Edit robots.txt manually (advanced)
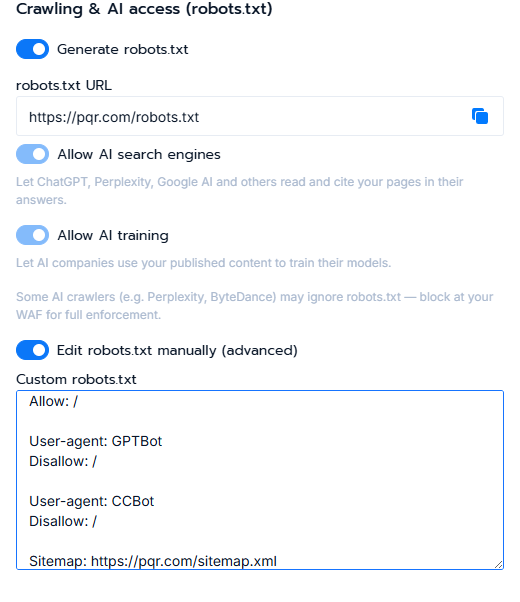
For advanced users who want full control, turning this switch on reveals a text box where you can write your own robots.txt exactly as you want it. It is pre filled with your current robots file so you can edit from where you are. While manual editing is on, the simple AI switches above are ignored and your custom text is used as is. Only use this if you understand robots.txt syntax. For everyone else, the two AI switches are all you need.
Saving and how your changes go live
Click Save to apply your settings. Your sitemap.xml and robots.txt are generated and published to your live domain right away. After that, the files are kept in sync automatically. Every time you publish, re publish or unpublish pages, the sitemap is rebuilt so it always matches what is live.
The one thing to keep in mind is that the Private (no index) setting is written into the page itself, so for an already live page it only takes effect after you re publish that page. Everything else, such as sitemap contents and robots rules, updates immediately on save. Turning a switch off does more than stop updates, it removes the matching file from your live site so it is no longer served.
Recommended settings
For a normal business or marketing website that you want found in search and AI, a good starting point is to turn Generate sitemap.xml on, turn Notify search engines on publish (IndexNow) on, leave normal pages included and leave funnel, checkout and thank you pages as their automatic private default, turn Generate robots.txt on, turn Allow AI search engines on, and set Allow AI training to your preference. Choose on for maximum reach, or off if you would rather your content is not used to train AI models. Then click Save and connect Google Search Console as described below.
Connecting Google Search Console
Google Search Console is Google's free tool that lets you confirm you own a website, submit your sitemap, and monitor how your site performs in Google Search. Doing this helps Google find and index your pages faster. Search Console works best with a custom domain, because verification usually requires access to your domain's DNS settings, which you control at your domain registrar.
Step 1: Add your site to Search Console
Go to search.google.com/search-console and sign in with a Google account. Click Add property and choose a property type. Domain is recommended because it covers your whole domain including www and all sub paths, and it requires DNS verification. URL prefix covers one exact address and offers more verification methods. Enter your domain and continue.
Step 2: Verify that you own the domain
The DNS method is the most reliable and is required for a Domain property. In Search Console, choose the DNS record verification method. Google shows you a TXT record value to copy, which looks like google-site-verification followed by a long string. In a separate tab, log in to wherever your domain is registered or managed, open the DNS settings for your domain, and add a new record. Set the type to TXT, the name or host to the @ symbol, which means the root domain, and the value to the google-site-verification string from Google. Leave the TTL at its default and save the record. Go back to Search Console and click Verify. DNS changes can take from a few minutes to a few hours to take effect, so if verification fails immediately, wait a little and click Verify again. If you cannot use DNS on a URL prefix property, Search Console also offers verification through a Google Analytics or Google Tag Manager account already installed on the site.
Step 3: Submit your sitemap
Once your domain is verified, open Sitemaps in the left hand menu. In the add a new sitemap field, enter the path sitemap.xml, since Search Console already knows your domain. Click Submit. The status should change to Success within a short time, and Google will start discovering the pages in your sitemap. You can copy your exact sitemap address any time from the Sitemap URL field in the panel.
Step 4 (optional): Bing Webmaster Tools
If you would also like to appear in Bing, and therefore in ChatGPT and Copilot search which use Bing's index, go to bing.com/webmasters and sign in. You can import your verified site directly from Google Search Console, which is the quickest option, or add and verify it separately using the same DNS TXT method. Submit the same sitemap address under Sitemaps. Turning on IndexNow in the panel will then notify Bing automatically whenever your pages change.
Frequently asked questions
My page is not showing in Google
Make sure the page has Include in sitemap on and Private off, then re publish it. Confirm your domain is verified in Search Console and your sitemap shows Success. New pages can still take days to appear, which is normal for Google.
I turned a page private but it is still in Google
Re publish the page so the no index instruction reaches the live page, and remember Google can take time to drop a page after it next crawls it.
Do I need to enable AI training
No. Leaving it off does not hurt your normal search rankings or your visibility in AI answers. It only stops your content being used to train AI models. Choose based on your preference.
I have a shared subdomain, not a custom domain. Can I still verify in Search Console
Verification normally needs DNS access, which you do not have on a shared subdomain. For full Search Console verification, use a custom domain. Your sitemap and robots files still work on the subdomain regardless.
Can I edit the robots.txt myself
Yes. Turn on Edit robots.txt manually (advanced) and edit the text directly. Only do this if you are comfortable with robots.txt rules.